Network device integrations have been updated in WitnessAI v2.0. Devices configured for WitnessAI v1.5 will need a minor update to support v2.0. Some new features will not activate until your devices are updated.
Existing v1.5 network devices will continue to work without interruption in v2.0.
See the network integration guides in the Integrations menu for details.
Have questions? Our support team will be happy to assist.
💡
Zscaler integration Note: WitnessAI requires a service account for administering Zscaler. For example, svc_witnessai_zia. Instructions are in the Configure Service Account section below.
Zscaler integration Note: WitnessAI requires a service account for administering Zscaler. For example, svc_witnessai_zia. Instructions are in the Configure Service Account section below.
The service account and password must be provided to WitnessAI during onboarding.
This service account is used by WitnessAI to create and manage the URL category WitnessFwdUrls, which contains domains associated with AI websites.
Note: This Url category is managed exclusively by WitnessAI and should not be modified by administrators.
Configure Service account
Create a new Role
Navigate to Administration → Authentication → Administration Controls → Role Management
At the top, click “Add Administrator Role”
Enter the role name as Beta-API-Scope
Navigate to Policy & Components (1), click on URL Categories (2) followed by Custom (3).
Configure the Custom URL Category
Set Zscaler Defined URL Category Management to None.
Set Override Existing Categories to None.
Set Custom URL Management to full.
If there are any new categories, set them to either None or View Only.
Provide the name of the account and password to the WitnessAI account team.
Cloud Service API Key
Create a new API Key
Navigate to Administration → Authentication → Authentication Configuration → Cloud Service API Security
Click Add API Key, if you haven’t created one already. If there is an API Key created (1), copy the Key and the base URL (2) and provide it to your WitnessAI account team.
Proxy Setup
Install WitnessAI Provided Root Certificate
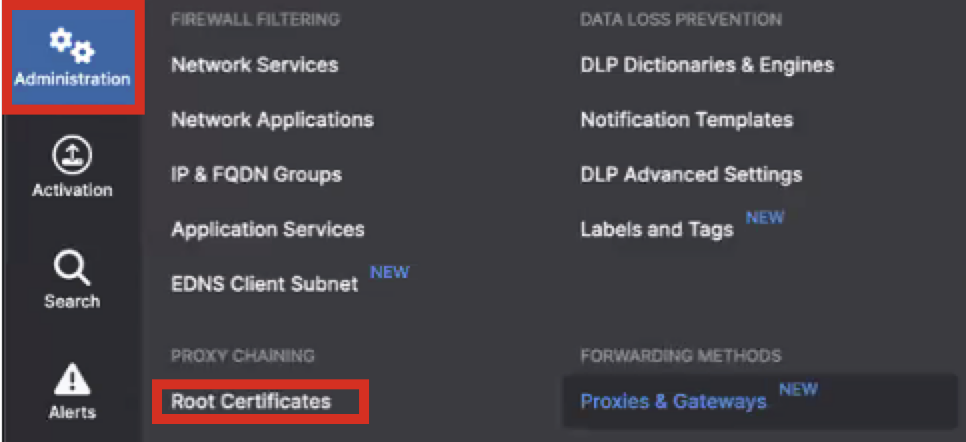
Click Administration → Root Certificates.
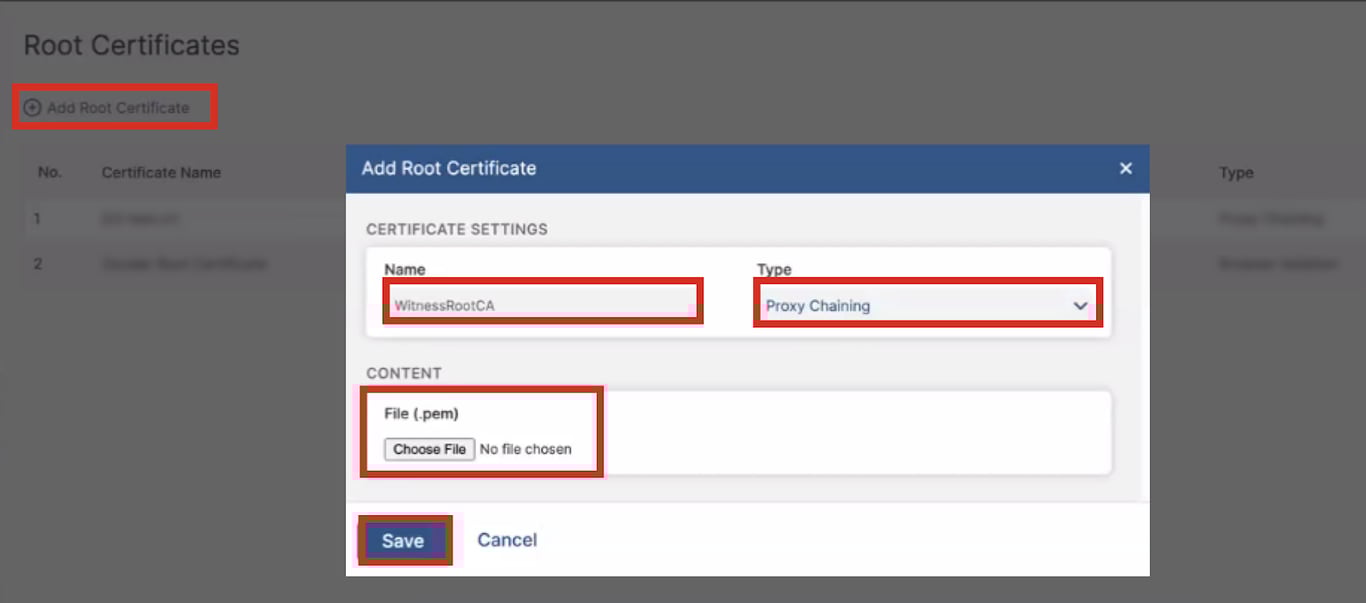
2. Click Add Root Certificate.
Name: [WitnessRootCA]
Type: [Proxy Chaining].
WitnessAI will provide the Root Certificate for the administrator to upload – once uploaded, click Save.
Note: WitnessAI can support a customer provided Root Certificate. However, it is recommended that administrators create a unique Root Certificate specific for the WitnessAI platform and provide it to the account team.
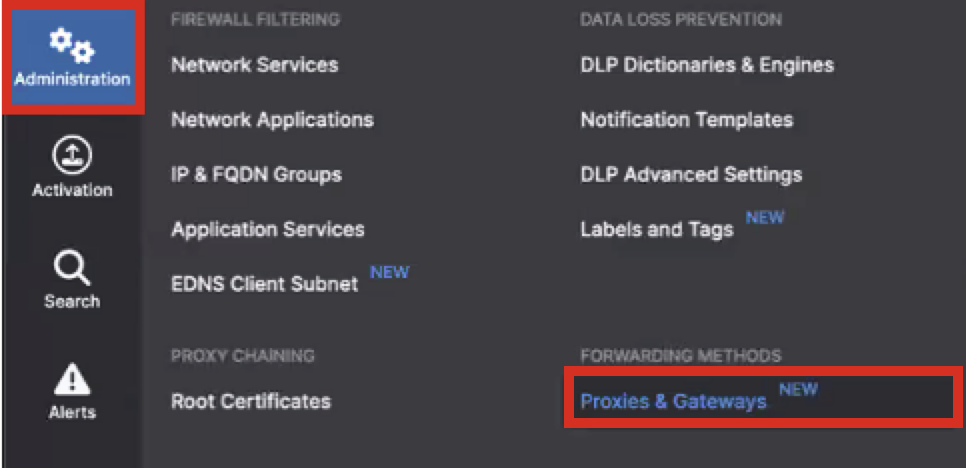
3. Select Administration → Proxies & Gateways.
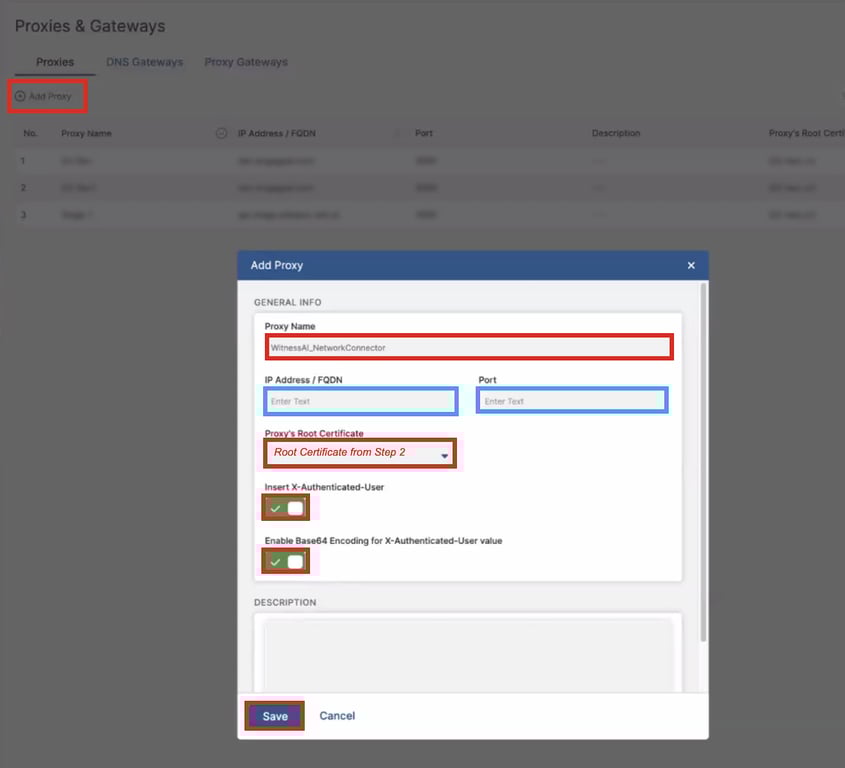
4. Select Add Proxy and update the Proxy Name to [WitnessAI_NetworkConnector].
For Proxy’s Root Certificate, select the Root Certificate created in Step 2.
FQDN → connect.[tenantID].[region].witness.ai
Port → 4128
Enable the Insert-X-Authenticated-User switch.
Enable the Base64 Encoding for X-Authenticated-User value switch.
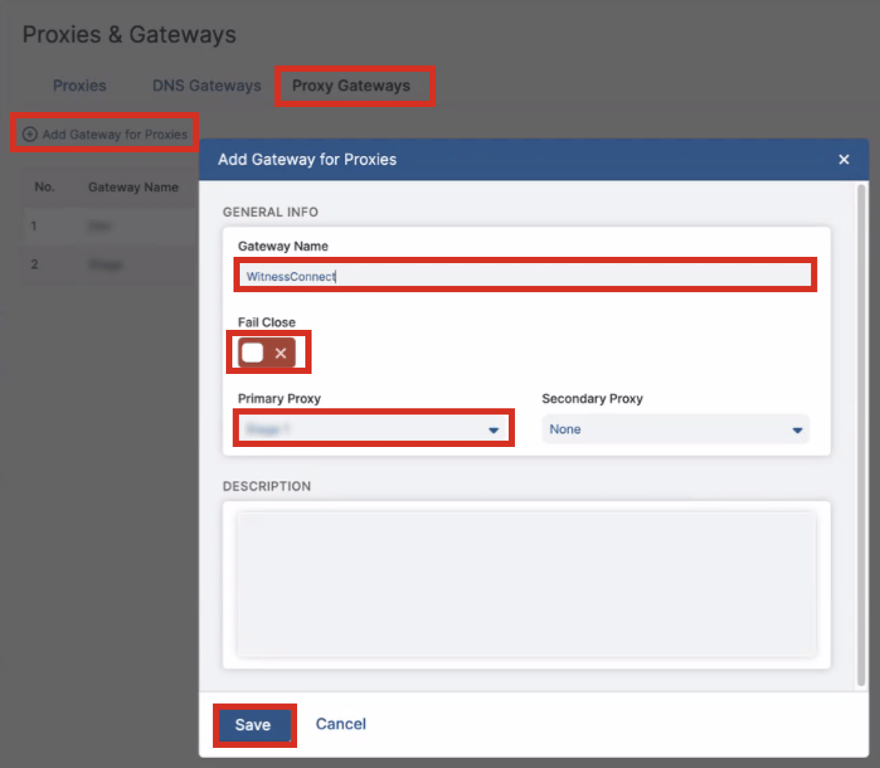
5. Go to Proxy Gateways
Click Add Gateway for Proxies.
Gateway Name: [WitnessConnect].
Fail Close: [Disable].
Primary Proxy: [WitnessAI_NetworkConnector].
SSL Inspection Configuration
1. Navigate to Policy → SSL Inspection and click on Add SSL Inspection Rule.
2. Input the following information
Rule Order: Place it above the Generic inspection/bypass rules.
Rule Name: [WitnessAI-Inspection Rule].
Rule Status: [Enabled].
URL Categories: [WitnessFwdUrls].
Action: Inspect
Enable HTTP/2: Yes
Select: Save
Network Connector Integration
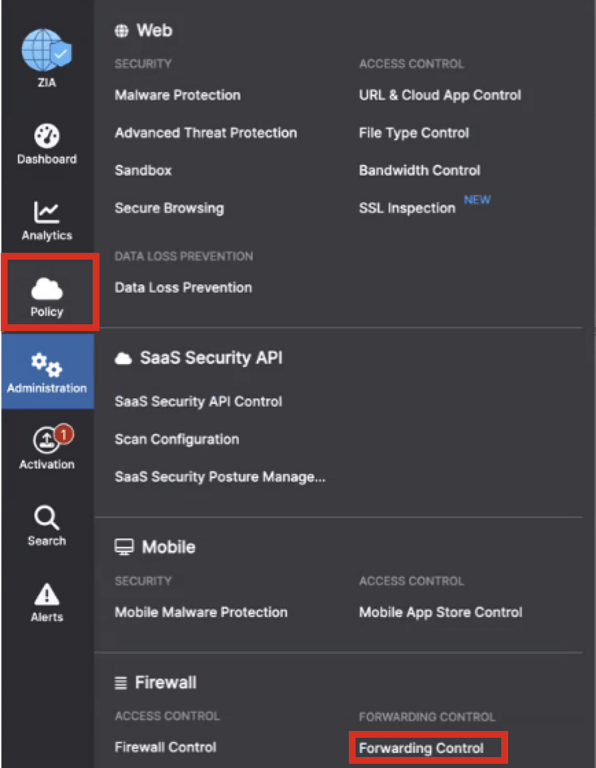
1. Select Policy → Forwarding Control.
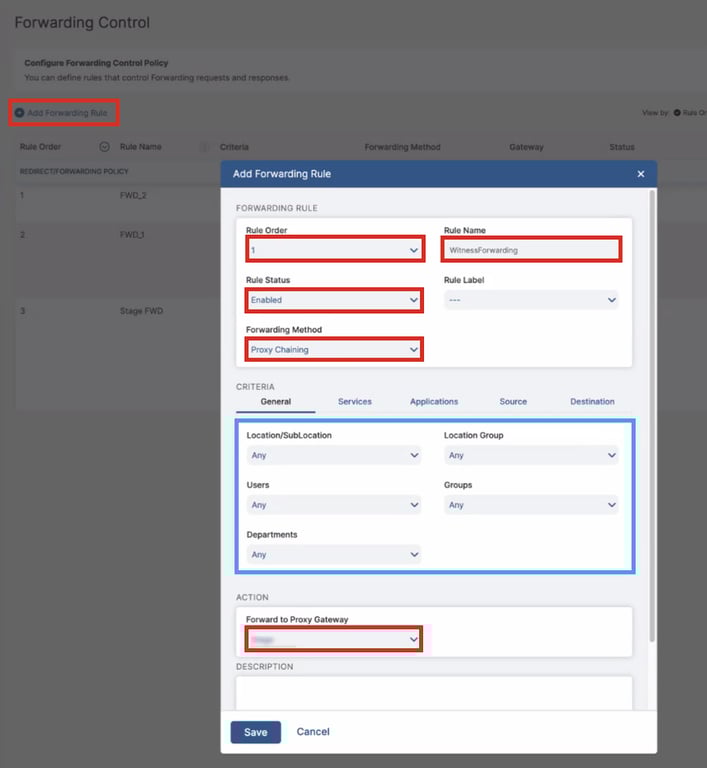
2. Select Add Forwarding Rule.
Rule Order – Make this as high as possible.
Rule Name: [WitnessForwarding].
Rule Status: [Enabled].
Forwarding Method: [Proxy Chaining]
General: [Define which user population will be inspected for AI].
Forward to Proxy Gateway: [WitnessAI_NetworkConnector].