Once the IT Administrator receives the email to integrate Okta, click the link and select Okta.
Create SAML Integration
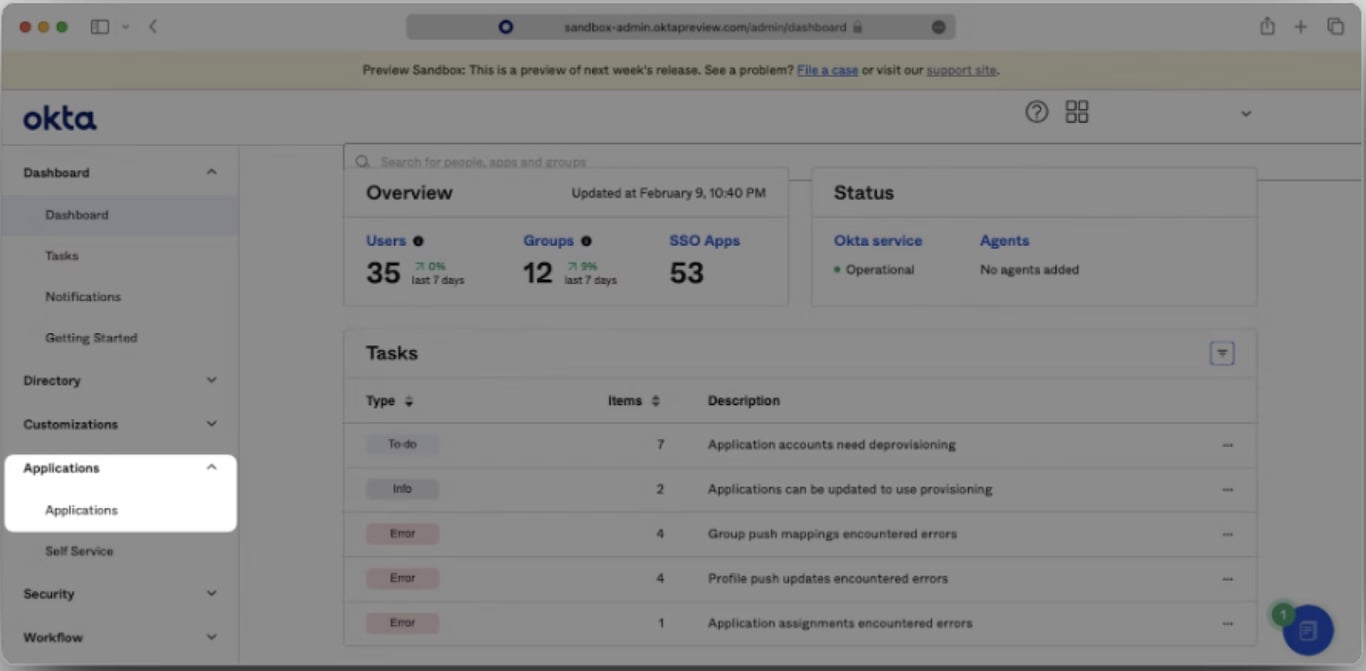
In your Okta Application Dashboard go to Applications in the sidebar.
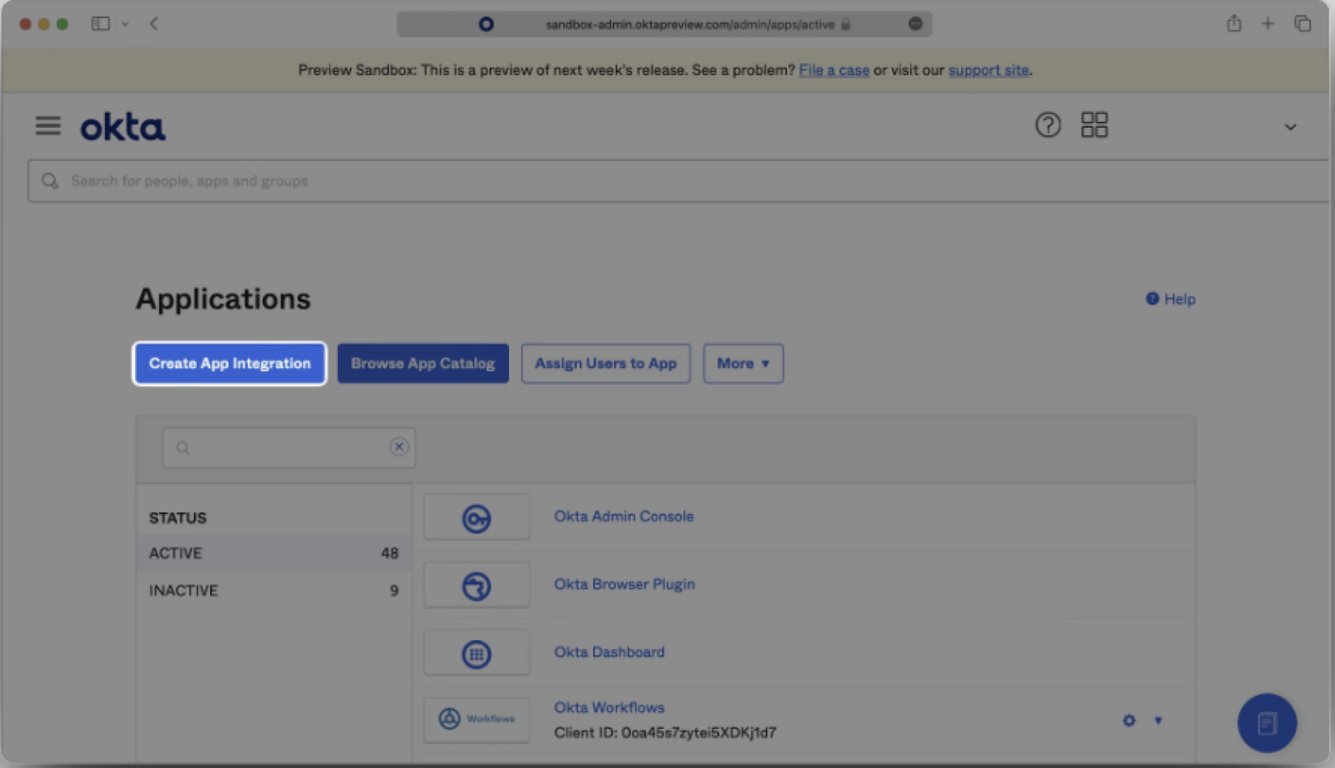
Click Create App Integration.
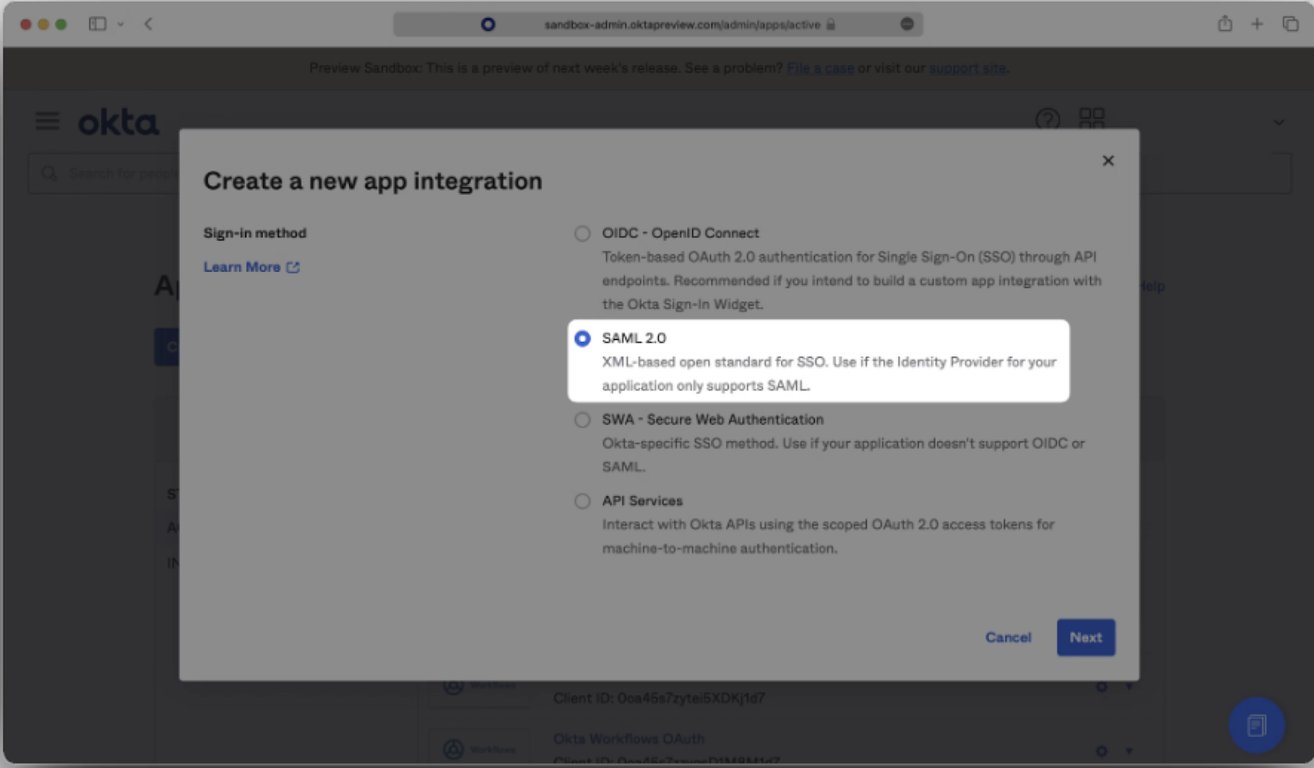
Select Create New App, then select SAML 2.0 as a Sign on method, then click Next.
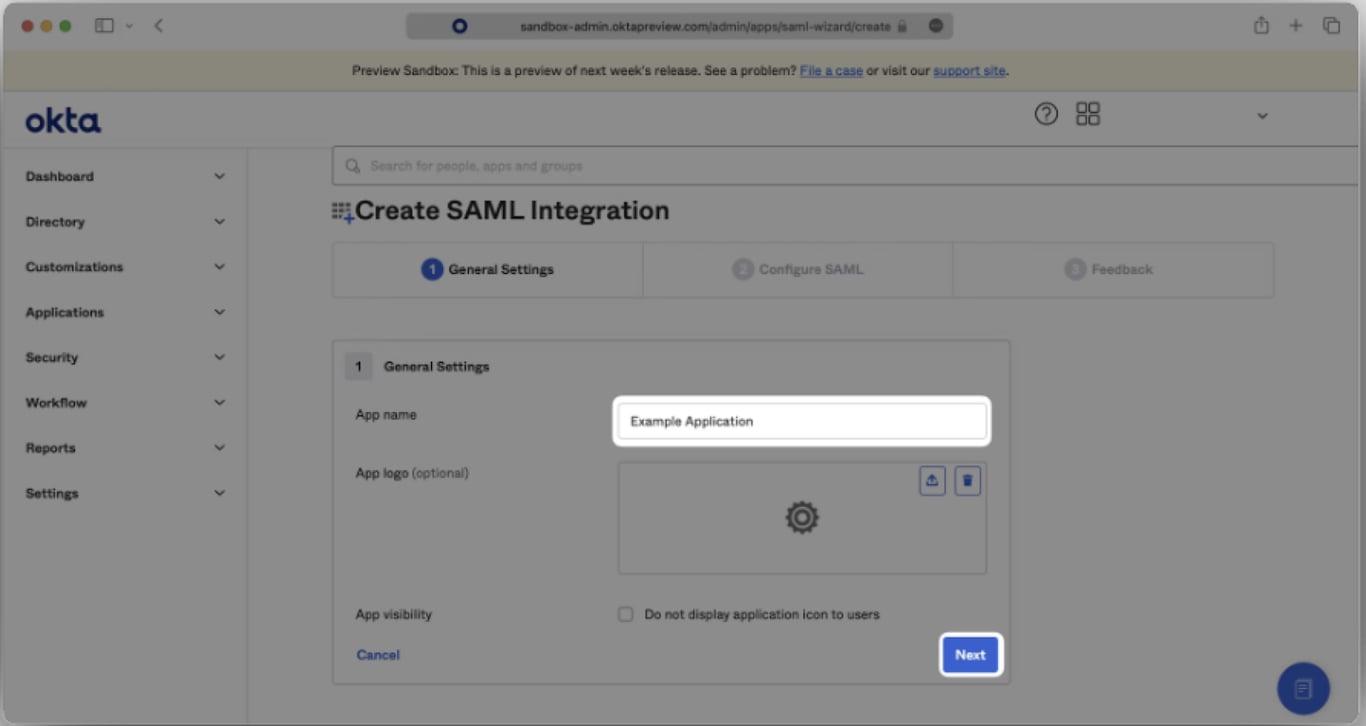
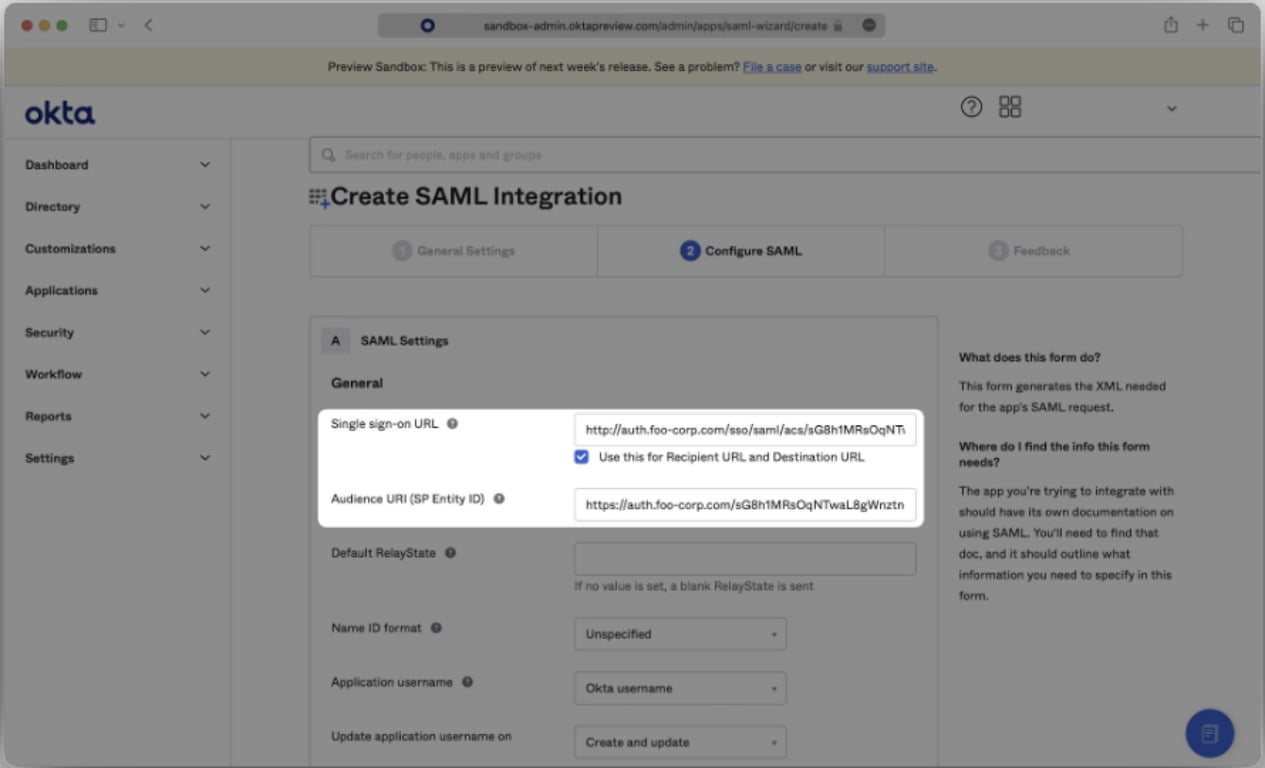
Enter a name in the “App name” field to describe your WitnessAI application, for example “WitnessAI”. Then click "Next".
Copy this Single Sign-On URL - replace customURI with your company’s URI.
Copy this Audience URI (SP Entity ID) - replace customURI with your company’s URI.
Submit the Single Sign-On URL and the Audience URI (SP Entity ID).
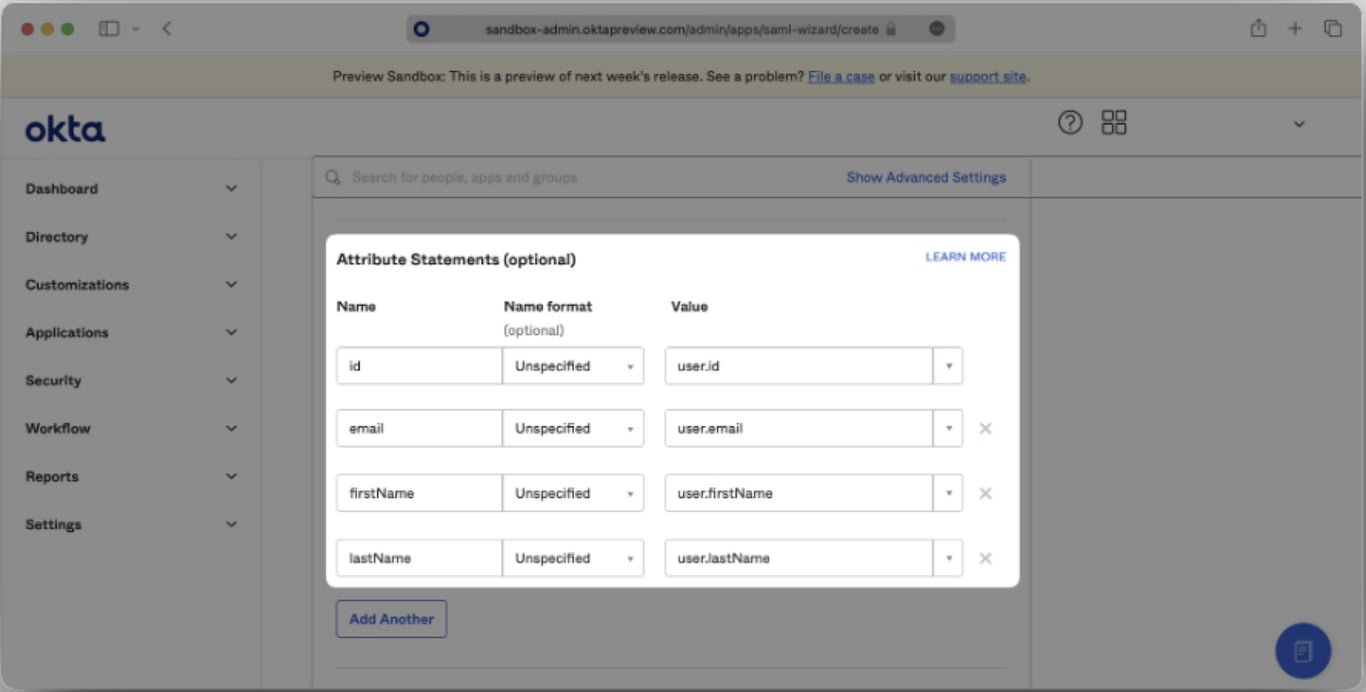
Configure Attribute Statements
Find Attribute Statements configuration in SAML Settings.
Fill in the following Attribute Statements and click Next.
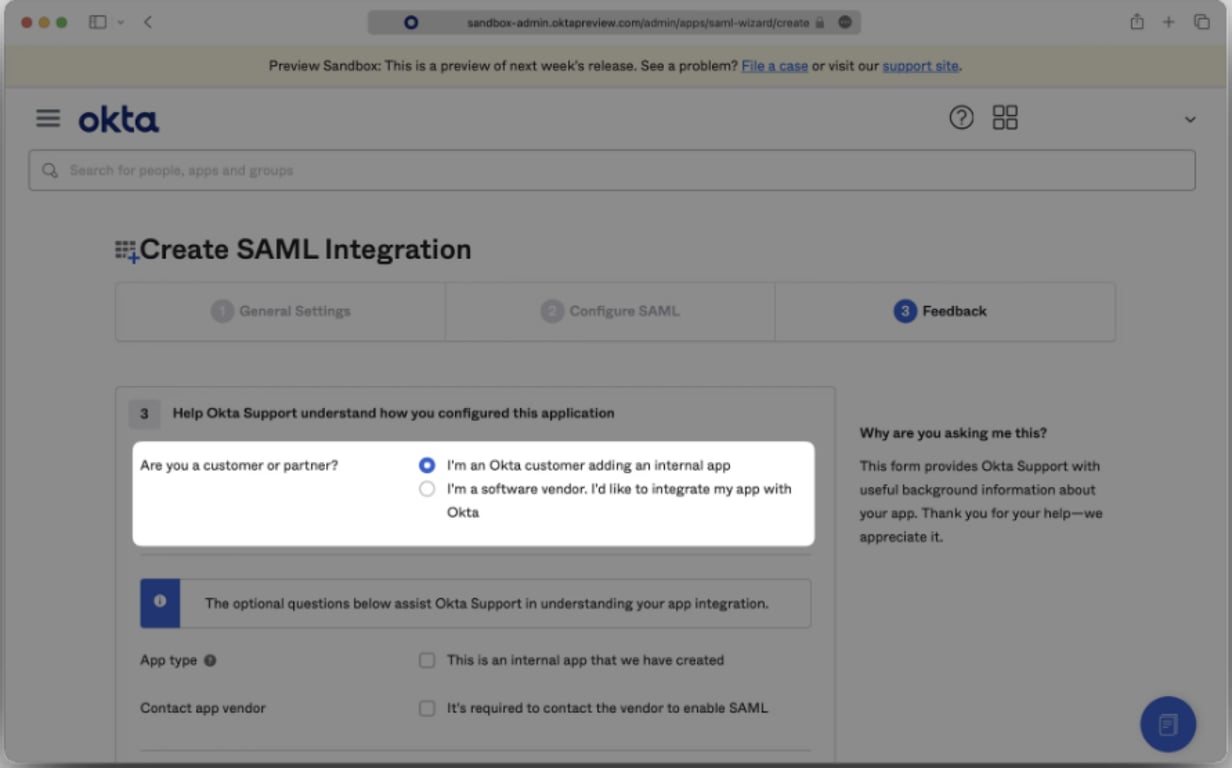
Submit Application Feedback
Select I'm an Okta customer adding an internal app from the options menu.
Complete the form with any comments and select Finish.
Add Users to SAML App
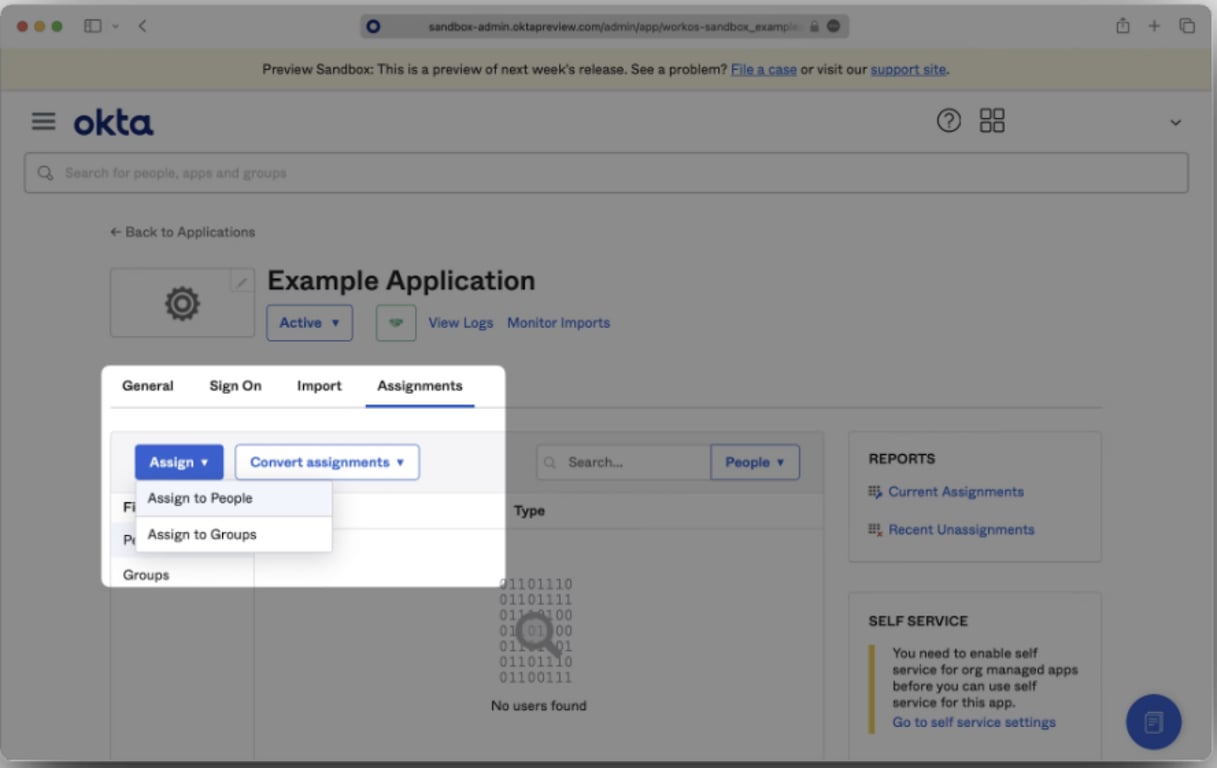
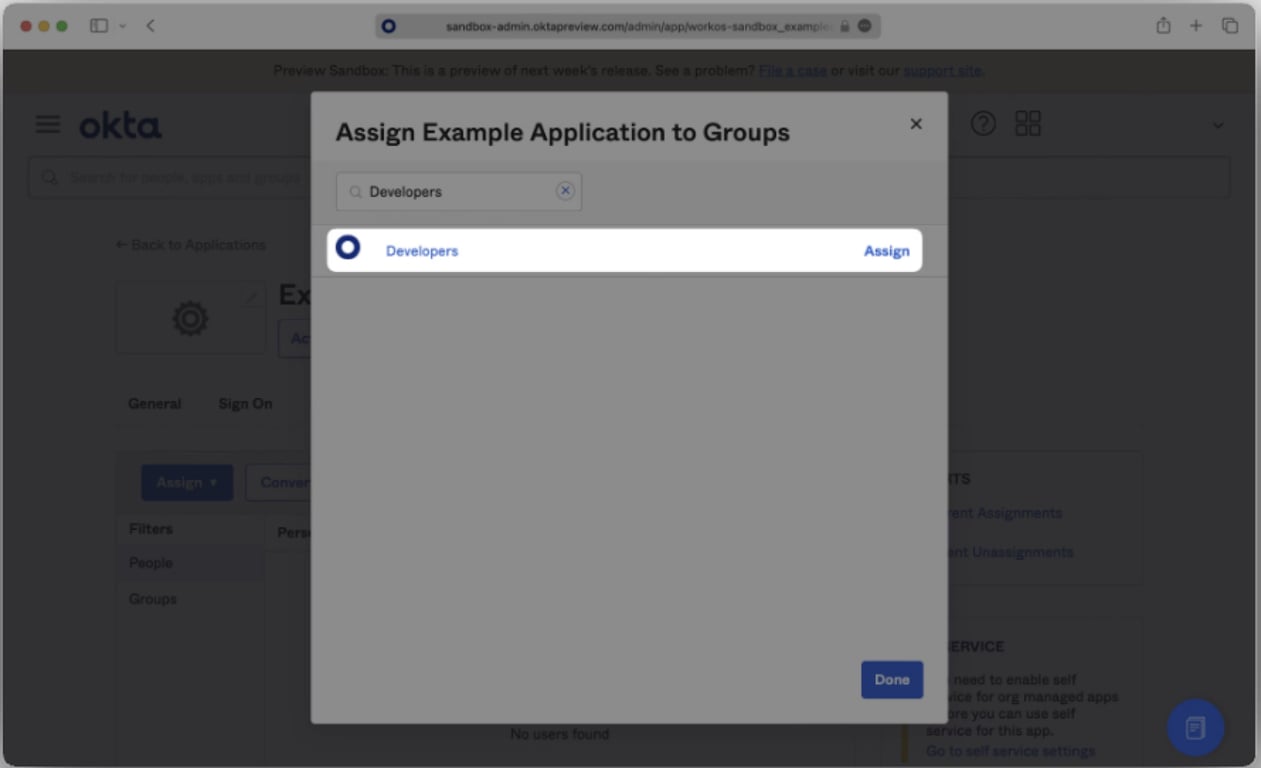
In order to test out SSO authentication, you will first need to assign your Okta SAML app to Groups.
Click on the Assignments tab of the app and then select Assign to Groups.
Find the Group(s) that you would like to assign to the app and click Assign next to it. Click Done when you're finished.
Upload Identity Provider Metadata
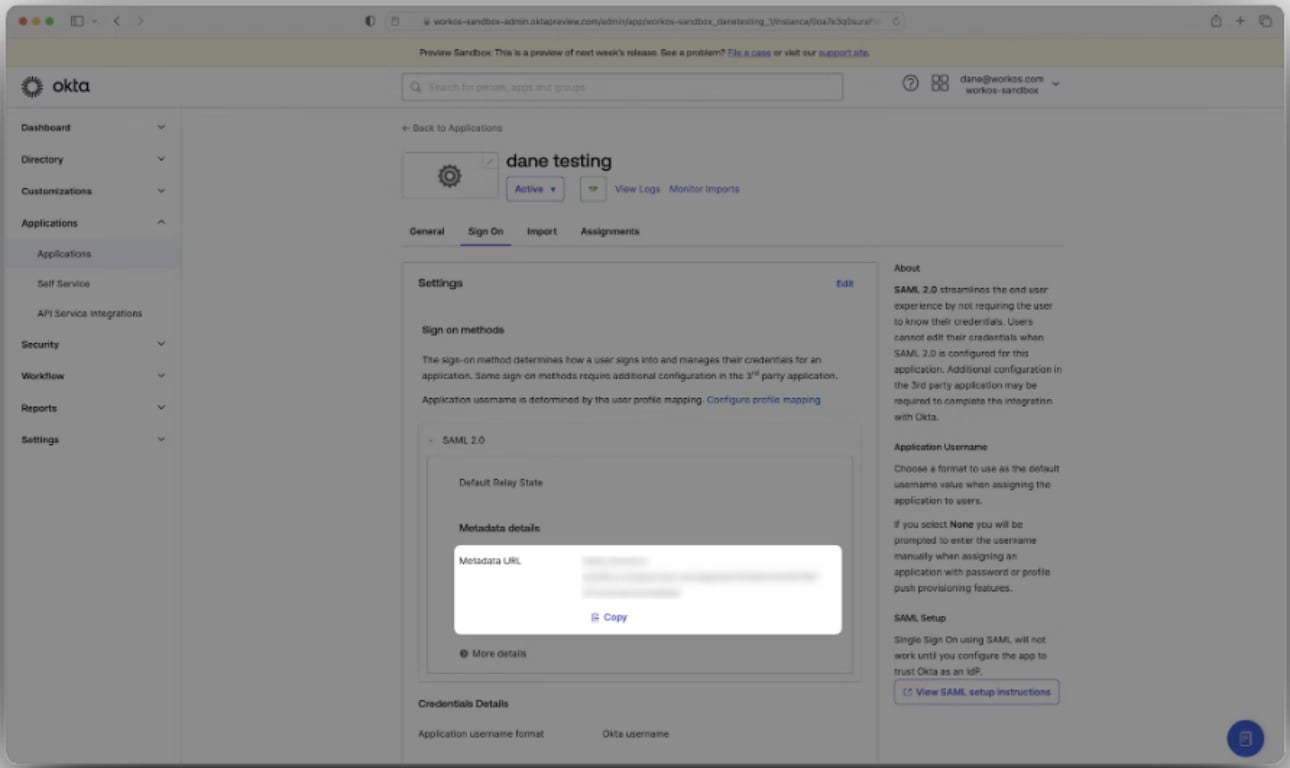
Click on the Sign On tab of the SAML app you just created.
Locate the Metadata URL under the Metadata details.
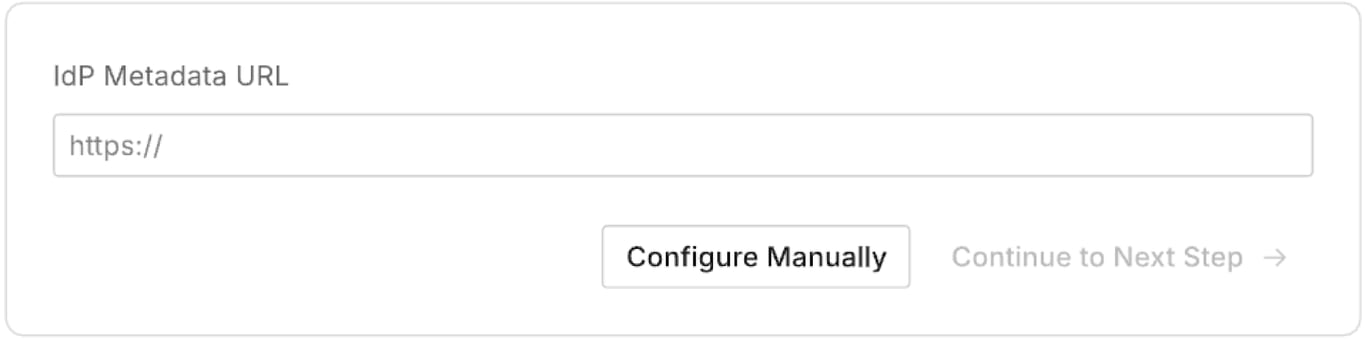
Select Copy to copy the link, then paste it below.
Test Single Sign-On
To activate Single Sign-On and verify that it was configured correctly you will need to perform a test sign-in with your identity provider.
Create SCIM Integration
Add SCIM Provisioning
From your Okta dashboard, navigate to Applications. Select your application from the list, as it was defined in the: Enter a name in the “App name” field in the Create SAML Integration section above
Click the General tab, then click Edit to modify the application settings.
Under Provisioning, select SCIM as the provisioning method, then click Save.
Click the Provisioning tab, then click Edit under the SCIM Connection section.
Edit & Test SCIM Connection
Enter the following information:
SCIM connector base URL: Paste the SCIM Base URL provided by the WitnessAI Account Team
Unique identifier field for users: email
Supported provisioning actions:
Push New Users
Push Profile Updates
Push Groups
Authentication Mode: HTTP Header
Authorization: Paste the Bearer Token provided by the WitnessAI Account Team
Now click [Test Connector Configuration].
Once the test is successful, click Save to apply the configuration.
Configure User Provisioning
Click Edit under Provisioning > To App Settings
Enable the following provisioning options, then click Save:
Create Users
Update User Attributes
Deactivate Users
Under the Sign On tab, ensure that the Application username format is mapped to the Okta attribute that contains the device username.
Example: If the username on the device for the user john.doe@company.com is emp123, john, or john.doe, make sure the userName attribute is mapped to the Okta attribute that holds this corresponding value.
Note: To identify the value of specific attributes, select Custom as the Application username format, enter the attribute name under Expression Language Reference, and preview the mapping for a user. This allows you to verify which Okta user attribute contains the correct device username.
Click Save after updating the attribute mappings. Please allow up to one hour for the changes to sync from Okta to WitnessAI.